
Every football player knows how important a mouthpiece is. Whether you play high school, college, or recreational football, your mouthguard protects your teeth, gums, and jaw from hard hits. But to get the best protection and comfort, you need a perfect fit—and that’s where boiling comes in.
If you’ve just bought a new mouthpiece and are wondering how to boil a football mouthpiece, this guide will walk you through the entire process. You’ll learn how to safely mold your mouthguard, what tools you’ll need, and common mistakes to avoid.
Why Boiling a Mouthpiece Matters
A football mouthpiece, also called a mouthguard, is typically made of thermoplastic material. This means it becomes soft when heated and hardens as it cools. Boiling the mouthpiece helps it mold perfectly to your teeth, ensuring:
Better protection: A snug fit absorbs impact more effectively.
Improved comfort: A custom fit prevents gagging and allows easy breathing.
Clearer speech: Players can communicate better when the mouthguard fits well.
Longer durability: Proper molding prevents damage from biting or poor fit.
So, boiling isn’t just a random step—it’s what turns a generic piece of plastic into a personalized layer of protection.
What You’ll Need
Before you start, gather everything you need. You don’t want to be scrambling mid-process while your mouthguard cools down.
Materials:
A new football mouthpiece
A pot (medium-sized)
Water
Stove or electric kettle
Slotted spoon or tongs
A cup of cold water
Mirror (optional)
Clean towel
If your mouthpiece comes with a strap (for attaching to your helmet), remove it before boiling unless the manufacturer says it’s heat-safe.
Step-by-Step Guide: How to Boil a Football Mouthpiece
Follow these steps carefully to make sure your mouthguard fits securely and comfortably.
Step 1: Boil the Water
Fill a medium-sized pot with enough water to completely submerge the mouthpiece. Place the pot on the stove and bring the water to a rolling boil.
Once the water is boiling, remove the pot from heat—you don’t want the mouthguard touching the bottom of the pot while the heat is still on, as it can melt unevenly.
Step 2: Submerge the Mouthpiece
Using tongs or a slotted spoon, gently lower the mouthpiece into the hot water. Let it sit for 30–45 seconds (check the manufacturer’s instructions, as some brands vary slightly).
You’ll know it’s ready when it becomes soft and flexible but not melted.
Tip:
If the mouthguard starts to fold over itself in the water, use your spoon to gently straighten it. You need it to stay flat for an even fit.
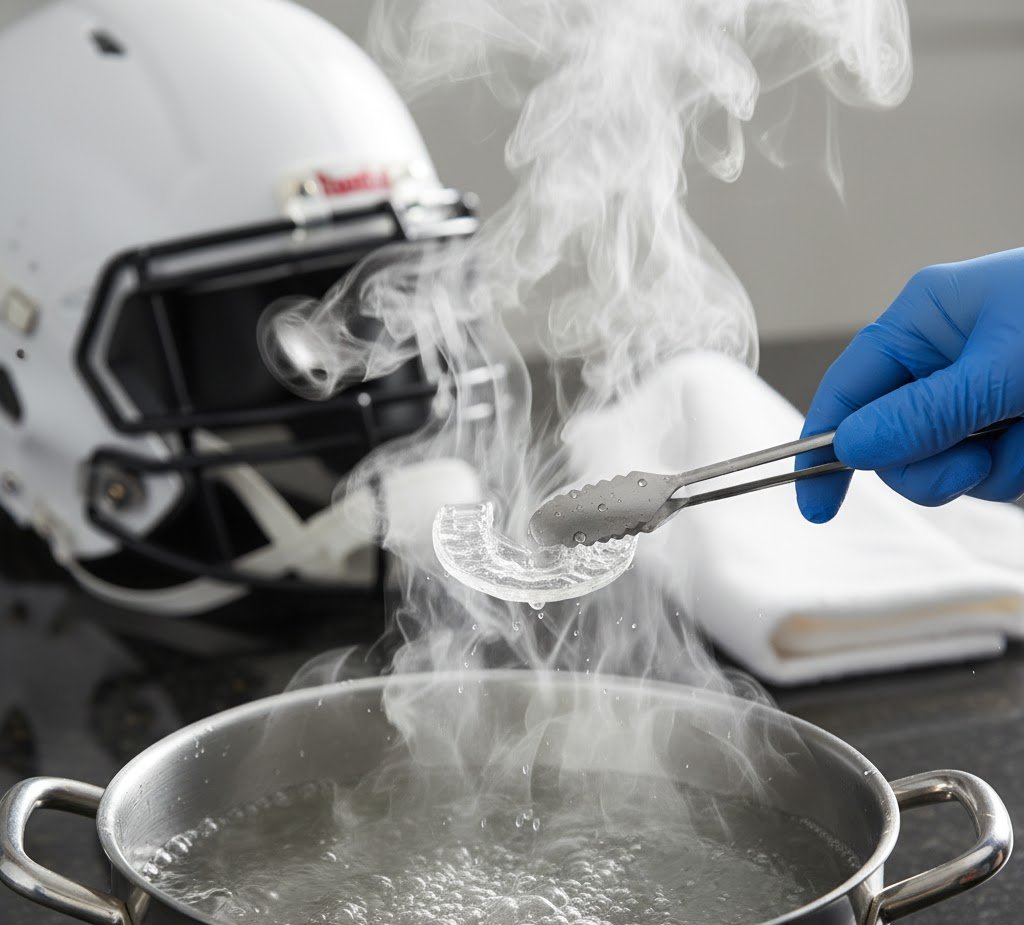
Step 3: Remove and Cool Slightly
Take the mouthguard out carefully with the tongs and shake off excess hot water.
Quickly dip it into a cup of cold water for 1–2 seconds—just enough to cool the surface so it won’t burn your mouth but still stays soft enough to mold.
Step 4: Fit the Mouthpiece
Now it’s time to mold it. Place the mouthpiece in your mouth, centering it over your upper teeth. Bite down firmly and suck in air to create suction. This helps the mouthguard form tightly around your teeth and gums.
Use your fingers to press it gently against your gums and front teeth from the outside, ensuring a smooth, tight fit.
Keep it in place for about 30 seconds, or until it starts to harden.
Step 5: Cool and Check the Fit
After molding, remove the mouthguard and place it in a bowl of cold water to set the shape. Let it cool for about 1–2 minutes.
Once cooled, try it on again. It should feel snug but comfortable. You should be able to talk and breathe easily without it falling out.
If it feels too loose or uneven, don’t worry—you can reboil it once or twice and try again.
Common Mistakes to Avoid
Many players ruin their mouthguards by making simple mistakes. Here are a few things to keep in mind:
Don’t overboil it.
Leaving the mouthpiece in boiling water for more than a minute can melt or deform it.Don’t skip the cooling dip.
Putting it in your mouth straight from boiling water can cause burns.Don’t bite too hard.
Press firmly but gently; biting too hard can cause uneven molding.Don’t forget to check the fit.
A loose mouthguard won’t protect you properly. Always test before playing.
How to Clean and Maintain Your Mouthpiece
Once you’ve got a perfect fit, you’ll want to take care of it properly. Here’s how:
Rinse after every use: Wash it with cold water or mild mouthwash to remove saliva and bacteria.
Deep clean weekly: Use a toothbrush and toothpaste or a denture-cleaning tablet to sanitize it.
Store it properly: Keep it in a ventilated case, not a sealed bag.
Avoid hot environments: Leaving it in your car or near heat can cause warping.
Replace when necessary: If it becomes loose, torn, or discolored, get a new one.
Alternative: Using a Microwave or Boil-Free Mouthguard
Some brands now offer boil-free or microwave-safe mouthguards. These can be convenient, but boiling remains the most reliable method for achieving a professional-level fit.
If you do use a microwave model, follow the exact instructions from the manufacturer—each brand may have a different heating time or setup.
Frequently Asked Questions (FAQ)
1. Can I use boiling water from an electric kettle instead of a stove?
Yes, absolutely. Just pour the boiling water into a heatproof bowl and follow the same steps.
2. How do I know if I boiled it too long?
If it becomes too floppy or starts losing its shape, it’s overboiled. The surface may look sticky or uneven.
3. Can I reboil my mouthguard if the fit isn’t right?
Yes, most mouthguards can be reboiled 1–2 times without issue. Just avoid doing it too often, as it can weaken the material.
4. How long does a mouthguard last?
With proper care, a football mouthpiece usually lasts a full season. Heavy users or those who grind their teeth may need to replace it sooner.
Why a Properly Fitted Mouthguard Matters
A correctly molded mouthpiece does more than protect your teeth—it reduces the risk of:
Jaw fractures
Concussions
Lip or tongue injuries
Tooth damage from collisions
Many professional and college players use custom-fitted mouthguards made from dental molds, but boiling your own is the next best thing—and much cheaper.
Final Thoughts
Boiling a football mouthpiece might seem simple, but doing it right makes a huge difference in safety and comfort.
By following this guide—boiling for 30–45 seconds, cooling briefly, and molding carefully—you’ll end up with a secure fit that lasts all season long.
So the next time you’re gearing up for a game or practice, make sure your mouthguard fits like a glove. It’s a small step that can make a big impact on your protection and performance.